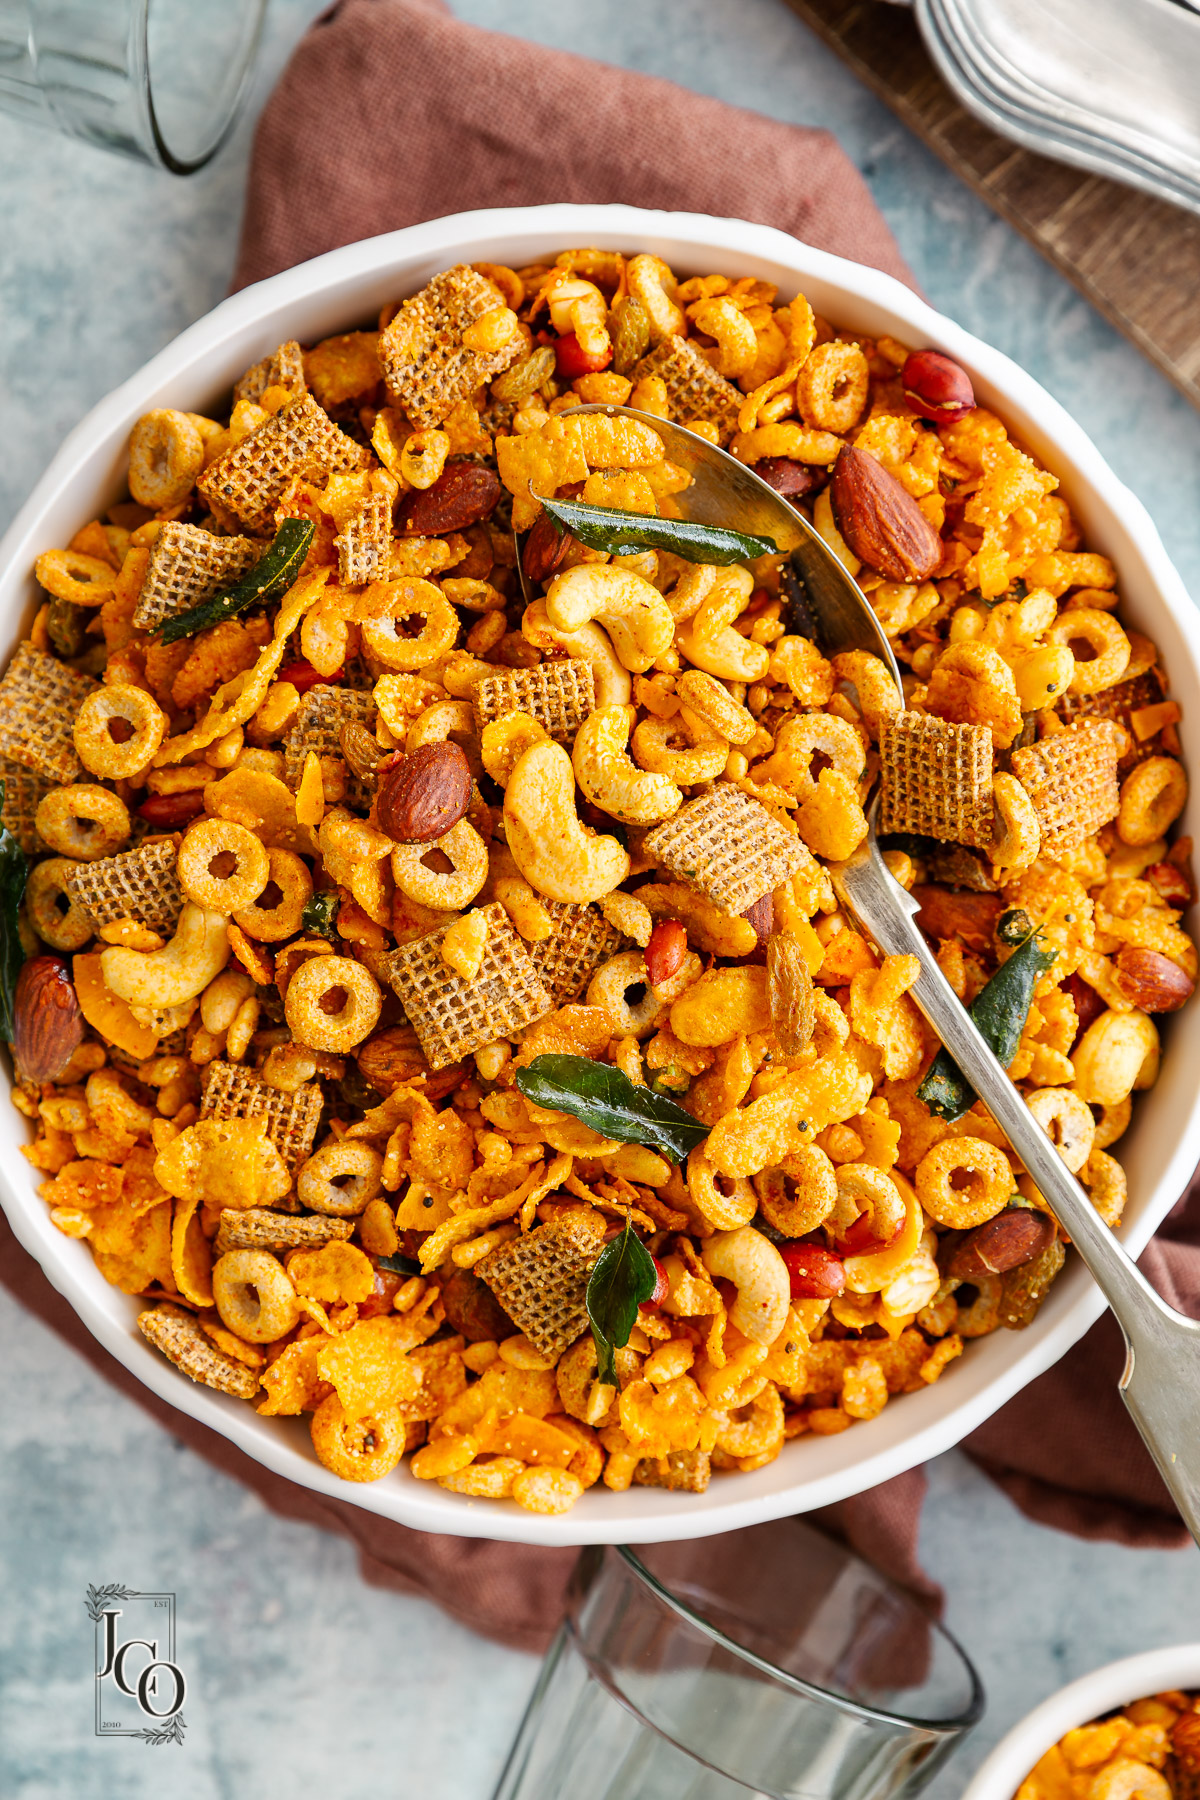
Cereal Chevdo is a crispy Indian snack mix made with a mix of packaged cereals, nuts and spices. This quick and easy savoury trail mix is mildly spiced, sweet, crunchy and totally addictive. It makes a great tea time snack but is delicious enough to be served on Diwali!
Indian chevdo or chivda, is a popular Indian snack mix made from crispy fried or roasted ingredients such as flattened rice (poha), lentils, nuts, and spices. Variations of ingredients make different types of chevdo such as cornflakes chevdo , kenyan chevdo , farali chevdo or poha chevdo .
Indian cereal chevdo is a bit different because the ingredients are baked rather than fried, using less oil and creating less clean up.
Various types of breakfast cereals are seasoned with basic masala powders such as red chilli powder and whole spices. A little amount of powdered sugar, citric acid is added to enhance the taste. It’s finished with a tempering of aromatic curry leaves and whole spices.
Serve it as it is with a cup of masala chai or pair it with yogurt for a quick breakfast.
Ingredients
Be sure to check out the full recipe and exact ingredient list below in the recipe card.
These cereals are available in the UK under the following names. You can use a mix of whichever cereal you have available. Stick to cereal that is plain rather than flavoured.
- Plain cornflakes
- Cheerios
- Bran flakes
- All bran sticks
- Rice crispies
- Shreddies
- Multi grain start
- Nuts and dried fruit – almonds, cashew nuts and sultanas
- Dried coconut slices or coconut flakes.
Storage
Cereal chevdo can be stored away for at least 2 weeks. It is important to allow the chevdo to fully cool before placing in an airtight container. It can be kept at room temperature.
As always if you make this recipe, be sure to leave me a comment, rate this recipe and tag me on Instagram @jcookingodyssey or #jcookingodyssey. I love seeing all your photos of my recipe recreations!
Don’t forget to follow me on social media using the buttons below – I can’t wait to see you all there!
- YouTube

Cereal Chevdo
Equipment
- Big mixing bowl
- small pan
Ingredients
- 100 grams cornflakes
- 100 grams cheerios
- 100 grams shreddies
- 100 grams rice crispies
- 100 grams bran flakes optional
- 100 grams all bran sticks optional
- 100 grams shredded wheat optional
- 250 grams almonds
- 250 grams cashew nuts
- 250 grams peanuts
- 5 tablespoons dried coconut slices or coconut flakes
- 2 teaspoon red chilli powder
- 3 tablespoon sugar
- 2 tablespoon white poppy seeds optional (Khus Khus)
- ½ teaspoon citric acid limbu na phool
- salt to taste
Vaghar (Tempering)
- 5 tablespoon oil
- 4 large green chillies sliced
- 12 fresh curry leaves
- 6 cloves
- 2 cinnamon sticks
- 1 tablespoon whole coriander seeds
- 1 tablespoon mustard seeds
- ½ teaspoon asafoetida hing
Instructions
- Gently roast almonds, peanuts and cashew nuts in the oven or in a dry pan on the stove for 3-4 minutes.
- Place all the cereals in a large bowl, add raisins and poppy seeds.
- Add roasted nuts and coconut slices.
- Grind sugar and citric acid in a coffee grinder to achieve a fine powder and add three quarters into the cereal.
- Add chilli powder and salt to the cereal and mix very well.
- Heat oil in a small pan, add mustard seeds, hing, cloves and cinnamon and fry for few seconds, then add curry leaves and green chillies and fry till they are crispy. Add coriander seeds and turn off the heat.
- Pour vaghar into the cereal mixture. Gently give it a good mix.
- If the flavouring isn’t sweet enough, then add the remaining ground sugar and citric acid..
- Give another good mix. When the cereal chevdo cools down transfer into an airtight container.
Video
Notes
Nutrition
PLEASE NOTE: Nutritional values are estimated by a computer and may vary based on ingredients and portion sizes. For personalised dietary advice, please consult a qualified healthcare professional.
Note – This recipe has been updated from our recipe archives with a new, improved recipe, new images and content. First published in April 2012.
Cereal Chevdo
Equipment
- Big mixing bowl
- small pan
Ingredients
- 100 grams cornflakes
- 100 grams cheerios
- 100 grams shreddies
- 100 grams rice crispies
- 100 grams bran flakes optional
- 100 grams all bran sticks optional
- 100 grams shredded wheat optional
- 250 grams almonds
- 250 grams cashew nuts
- 250 grams peanuts
- 5 tablespoons dried coconut slices or coconut flakes
- 2 teaspoon red chilli powder
- 3 tablespoon sugar
- 2 tablespoon white poppy seeds optional (Khus Khus)
- ½ teaspoon citric acid limbu na phool
- salt to taste
Vaghar (Tempering)
- 5 tablespoon oil
- 4 large green chillies sliced
- 12 fresh curry leaves
- 6 cloves
- 2 cinnamon sticks
- 1 tablespoon whole coriander seeds
- 1 tablespoon mustard seeds
- ½ teaspoon asafoetida hing
Instructions
- Gently roast almonds, peanuts and cashew nuts in the oven or in a dry pan on the stove for 3-4 minutes.
- Place all the cereals in a large bowl, add raisins and poppy seeds.
- Add roasted nuts and coconut slices.
- Grind sugar and citric acid in a coffee grinder to achieve a fine powder and add three quarters into the cereal.
- Add chilli powder and salt to the cereal and mix very well.
- Heat oil in a small pan, add mustard seeds, hing, cloves and cinnamon and fry for few seconds, then add curry leaves and green chillies and fry till they are crispy. Add coriander seeds and turn off the heat.
- Pour vaghar into the cereal mixture. Gently give it a good mix.
- If the flavouring isn’t sweet enough, then add the remaining ground sugar and citric acid..
- Give another good mix. When the cereal chevdo cools down transfer into an airtight container.
Video
Notes
Nutrition
PLEASE NOTE: Nutritional values are estimated by a computer and may vary based on ingredients and portion sizes. For personalised dietary advice, please consult a qualified healthcare professional.
These Eggless Coconut Cookies are buttery, crisp yet so light. They’re so easy to make at home and taste just like the coconut cookies in Indian bakeries.

If you’re looking for extra buttery cookies that melt in the mouth, then this recipe is the one for you. These cookies are flavoured with desiccated coconut in the dough and sprinkled on top for an extra hit of coconut flavour.
Serve coconut cookies with karak chai or Indian ginger chai . Badam milk is also a delicious and refreshing option.
They can also be served for guests on Diwali, Raksha Bandhan or Eid.
Ingredients
Be sure to check out the full recipe and exact ingredient list below in the recipe card.
Flour – I have used all purpose flour. You can also use whole wheat flour.
Butter – Unsalted butter at room temperature.
Sugar – Regular white granulated sugar.
Salt – Just a pinch to bring out the sweetness.
Desiccated Coconut – Use medium or fine variety coconut.
Baking powder
Vanilla extract
Optionally, add a pinch of cardamom powder.
Recipe Tips
- Ensure the butter you use is softened at room temperature. With softened butter, the fat content can be easily creamed together with sugar and also helps butter coconut cookies to cook evenly.
- Just a pinch of salt acts as flavour enhancer and elevates the taste of biscuits, do not add it if you use salted butter.
- Do not use coconut flakes as they are too large to mix in the dough. Use desiccated coconut only.
- Add 1-2 tablespoon of milk at a time and check whether it needs more or not. It depends on the quality of flour you use. Do not add all the milk at a time.
- If you want to bake cookies later, do not use baking powder in the recipe and store the dough tightly wrapped in cling film and keep it in the fridge or freezer.
- Keep an eye while baking as every oven/air fryer temperature may vary. Do not overcrowd the baking tray or air fryer basket
- Cup measurements are approximate, I prefer weighing the ingredients and following metric measurements for accuracy for baking.
Storage
Allow the cookies cool down completely to room temperature before storing them in an airtight container. They should keep well for up to 1 week.
Freezer
Once the cookies are completely cooled down, arrange them in a baking tray in single layer and ensure they don’t touch each other. Keep the tray in the freezer for 2-3 hours until the cookies are frozen solid. Wrap each cookie tightly in a cling film, transfer to an airtight container or zip lock bags and store in the freezer for up to 3 months.
To thaw cookies, take them out of the freezer and sit on the counter at room temperature. You can gently reheat thawed cookies in the oven to retain the taste and texture.

As always if you make this recipe, be sure to leave me a comment, rate this recipe and tag me on Instagram @jcookingodyssey or #jcookingodyssey. I love seeing all your photos of my recipe recreations!
Don’t forget to follow me on social media using the buttons below – I can’t wait to see you all there!
- YouTube

Eggless Coconut Cookies
Equipment
- 1 Bowl
- 1 Whisk
- 1 Baking tray
- 1 oven
Ingredients
- 250 gram plain flour
- 220 gram unsalted butter
- 200 gram sugar regular granulated
- 60 gram desiccated coconut
- ½ teaspoon vanilla extract
- 1 teaspoon baking powder
- ½ teaspoon salt
- 2 tablespoon milk if needed
Instructions
- Preheat the oven to gas mark 4 or 180℃.
- In a big bowl whisk butter and sugar together until light and fluffy.
- Add salt and whisk again.
- Now add flour, coconut ( Leave a one tablespoon coconut aside to roll the cookies)
- Mix everything well and knead the dough, if needed add milk and knead the dough.
- Divide the dough into small equal sizes and roll into balls.
- Roll them into the coconut, If you want you can press the cookie balls with your thumb and make slightly flat.
- Line them on a baking tray and bake them for 18-20 minutes or until bottom parts of the cookie gets slightly golden brown.
- Remove it from the oven and leave it to cool completely.
Video
Nutrition
PLEASE NOTE: Nutritional values are estimated by a computer and may vary based on ingredients and portion sizes. For personalised dietary advice, please consult a qualified healthcare professional.
Note – This recipe has been updated from our recipe archives with a new, improved recipe, new images and content. First published in March 2018.
